Picture Overlay - Clickable Area
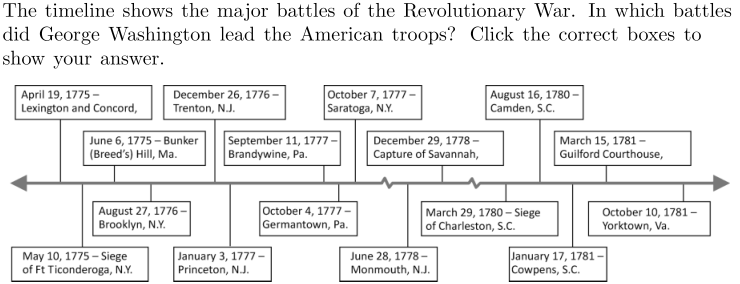
The example below is Problem 19 in “Interactive Questions (US History)”.
Thumbnail Preview
Example Video
Step-by-step instructions
To create the above question in Problem-Attic, follow these steps:
-
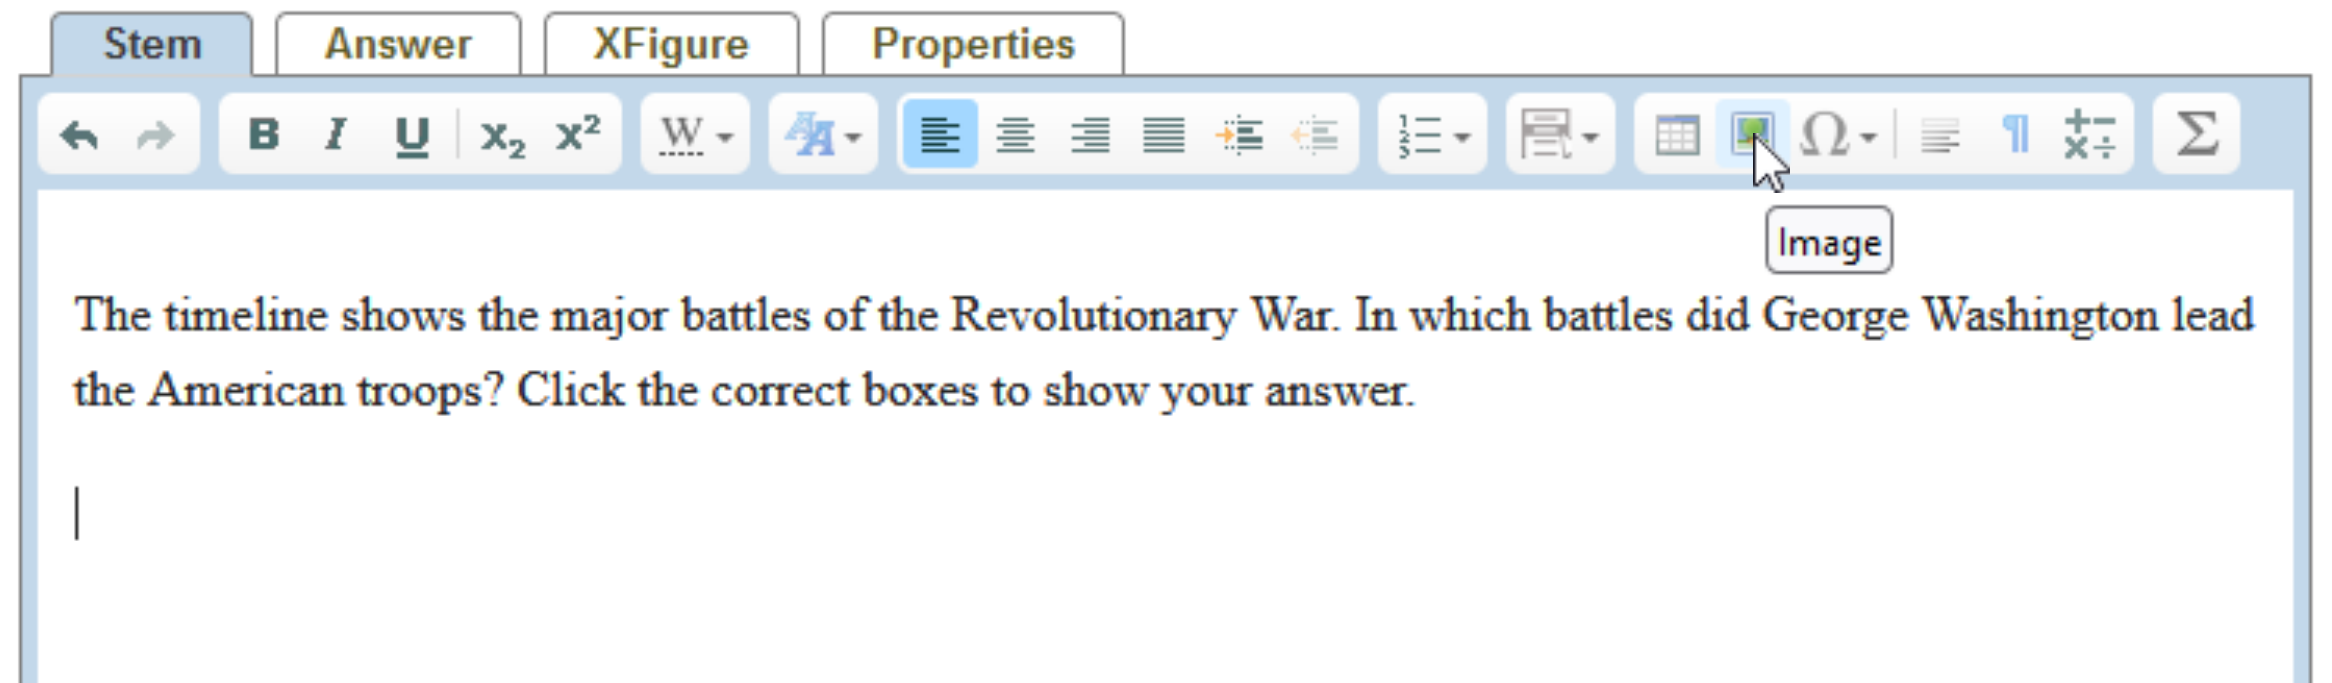
Go to the Arrange tab and click Write New Problem.
-
In the editor, type the question that allows the student to interact with an image, then press Enter to start a new line.
-
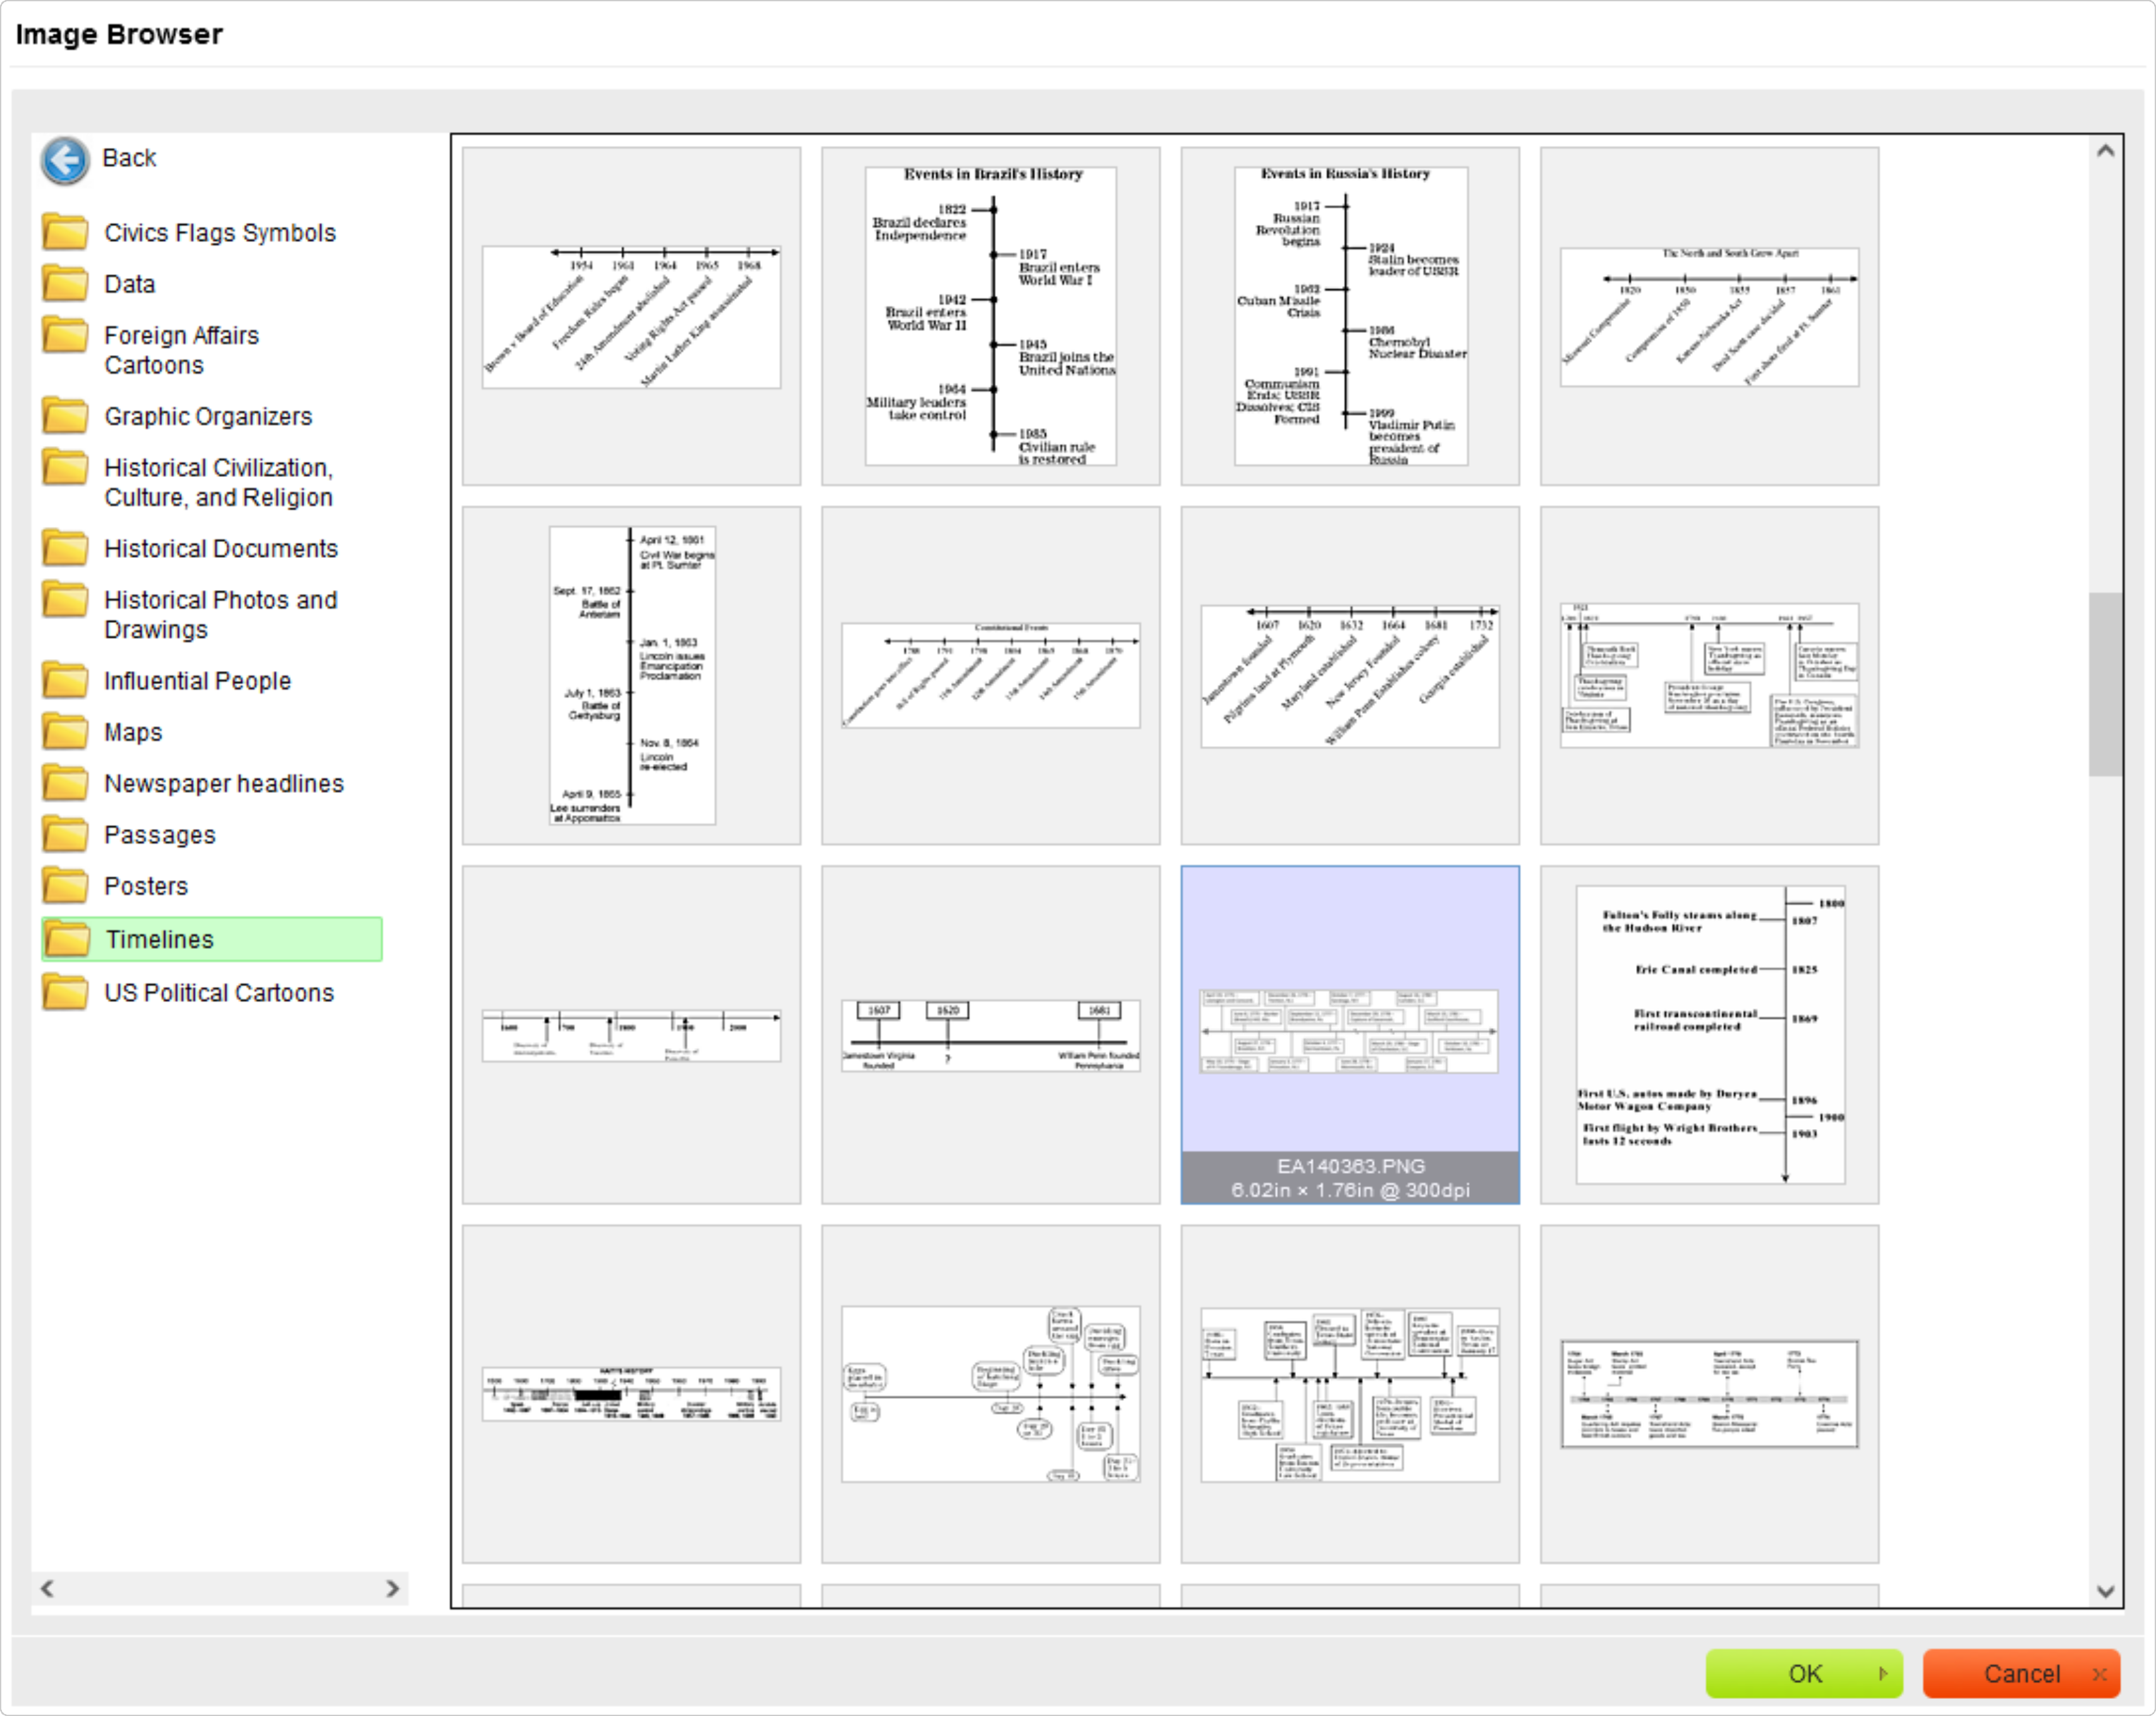
In the editor toolbar, click Image to open the image browser. Upload an image or choose from Problem-Attic's library of stock images.
-
Click OK at the bottom of the dialog box.
-
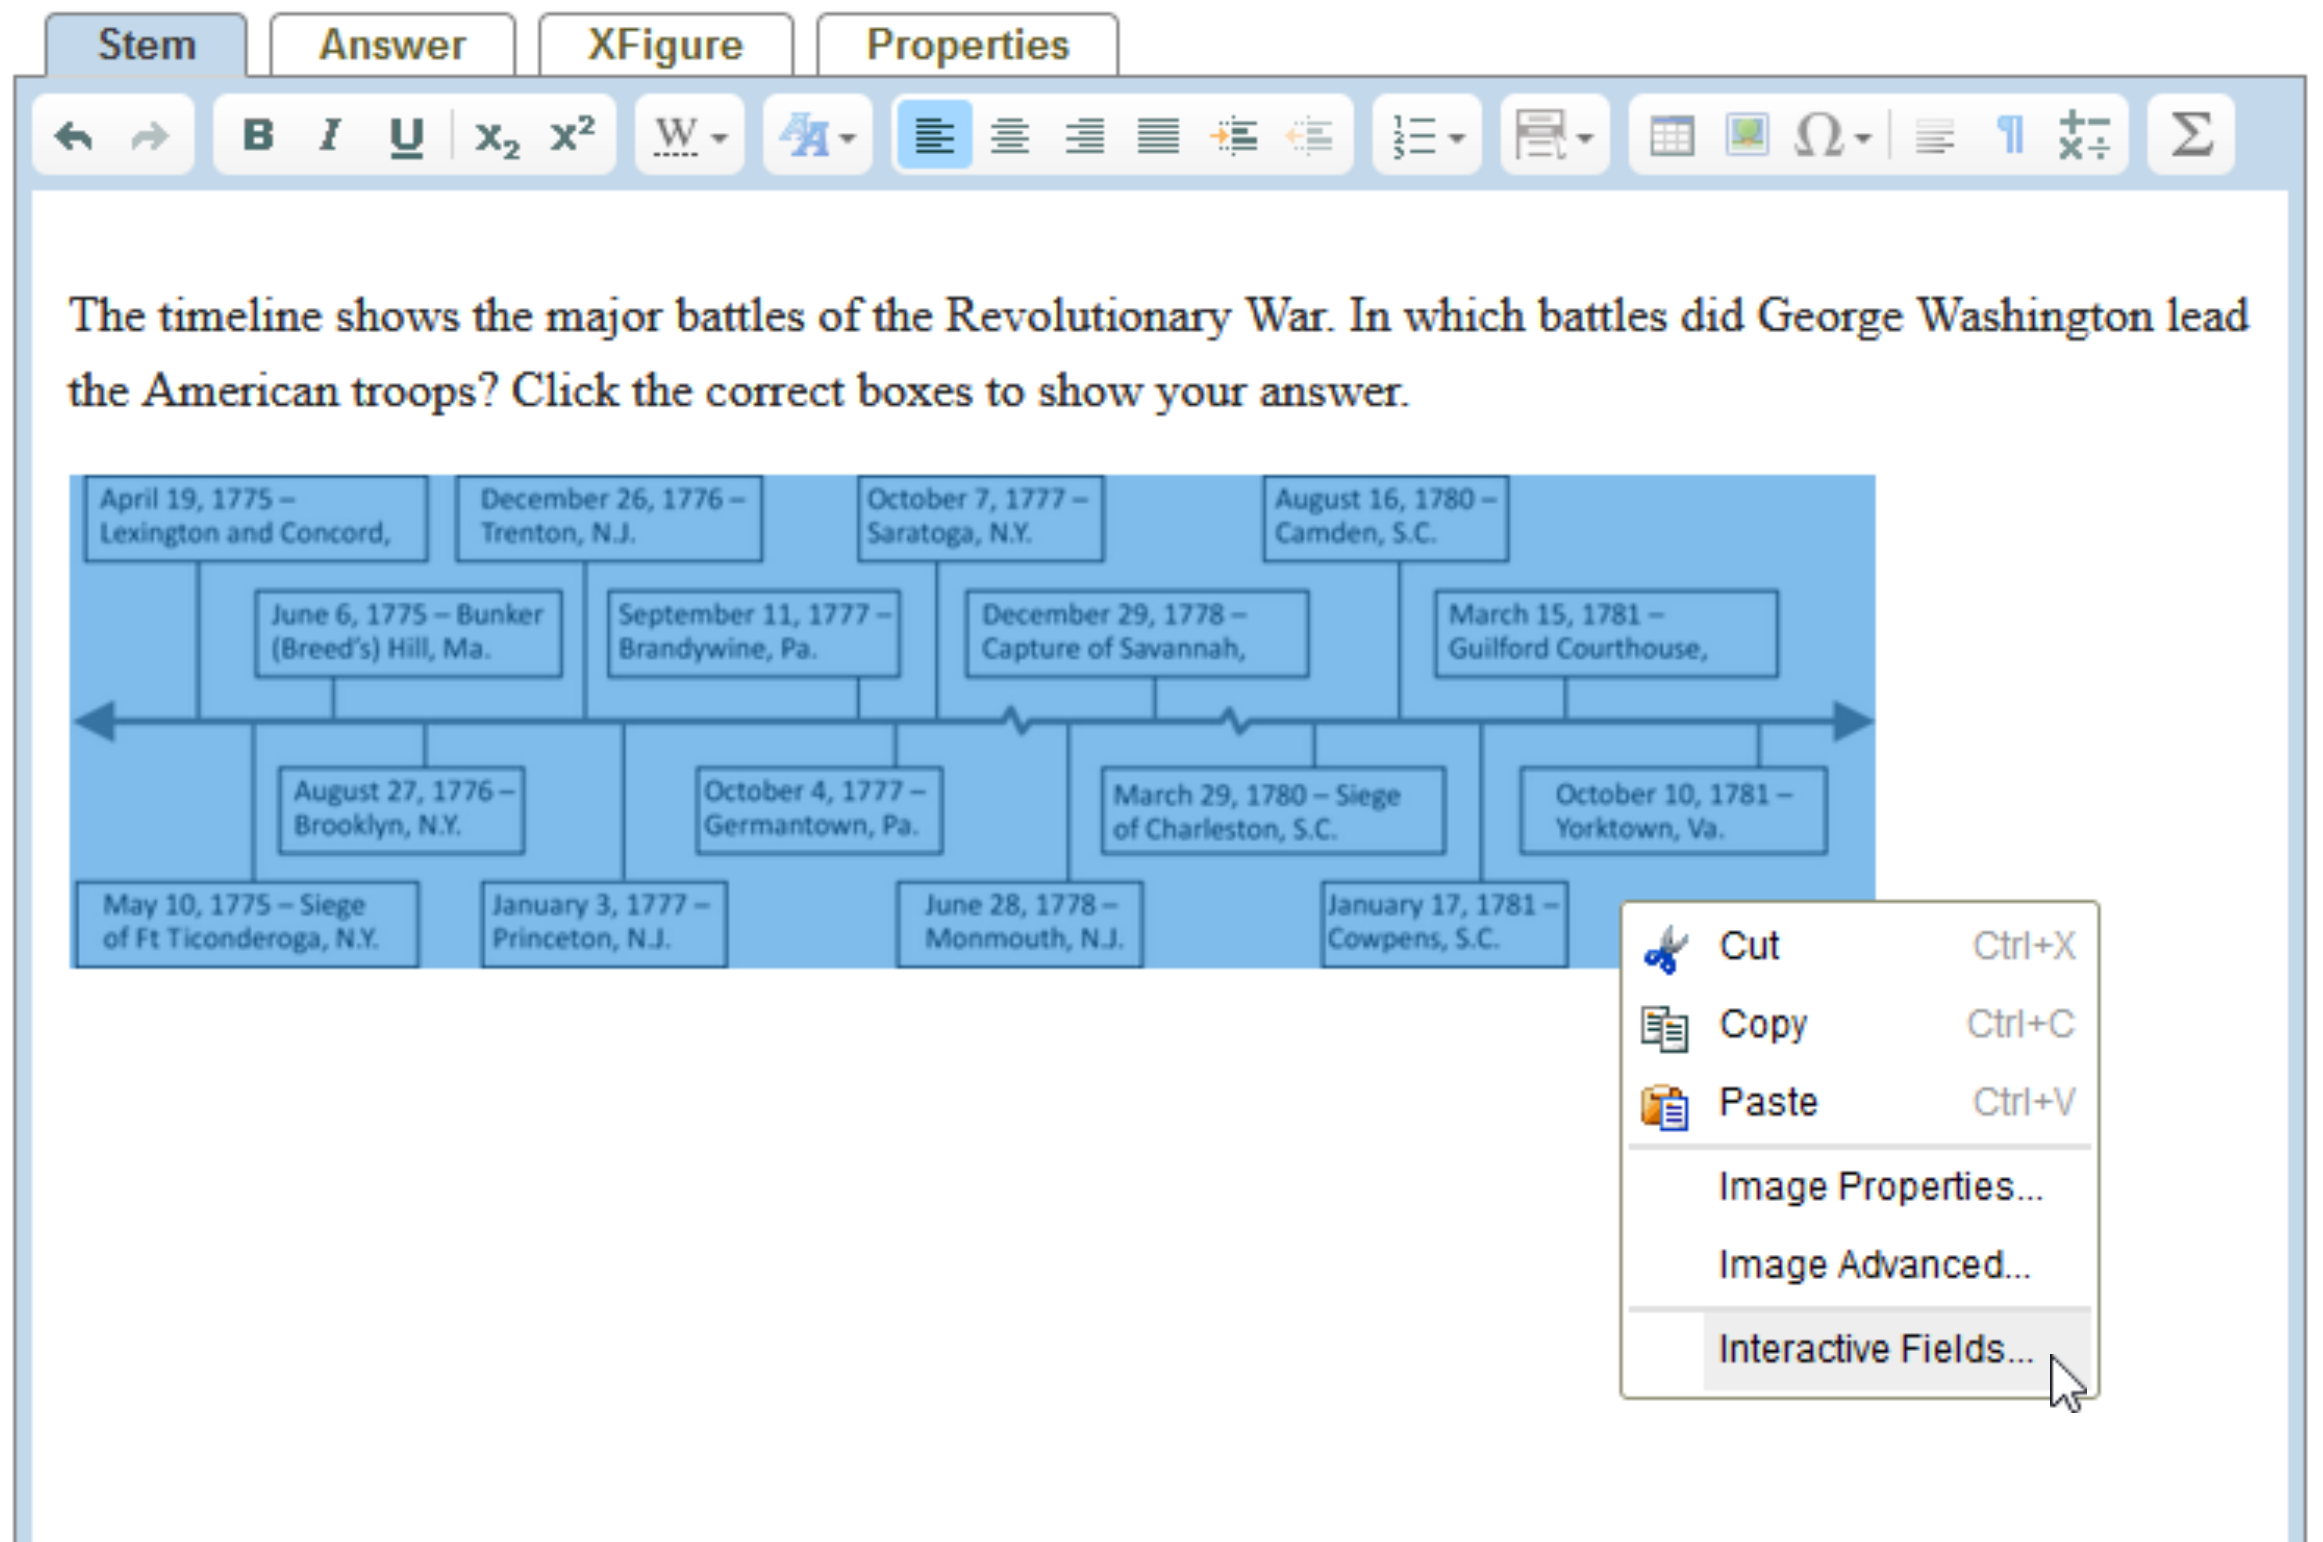
In the editor, right-click the image and select Interactive Fields from the pop-up menu.
-
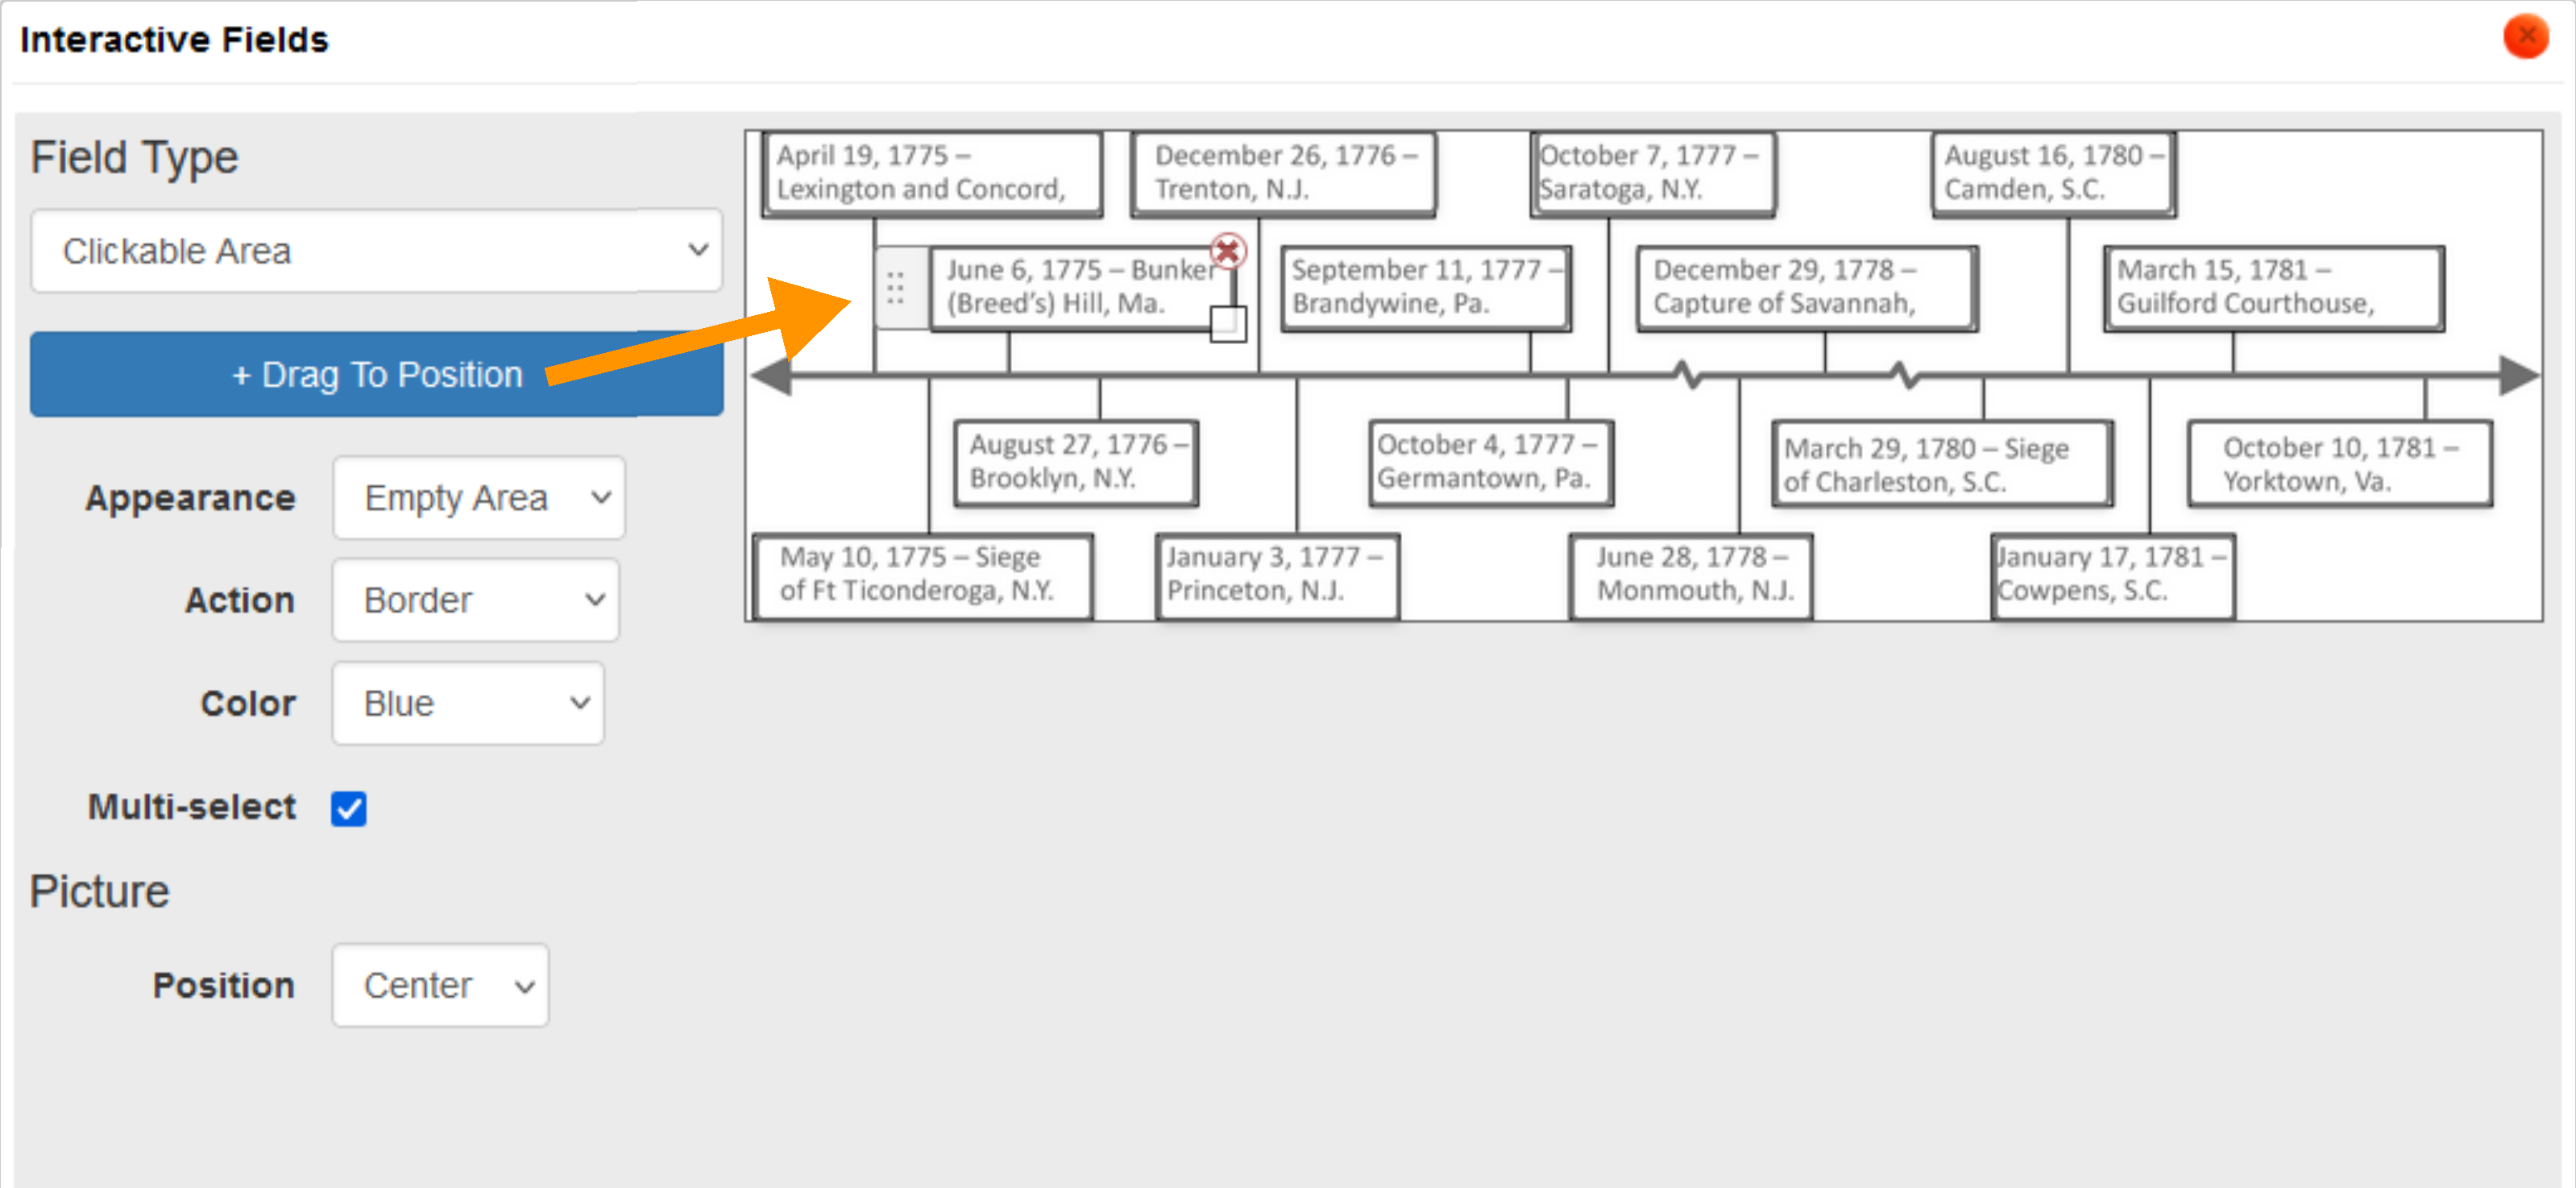
For Field Type, select Clickable Area. Change the settings to Appearance: Empty Area, Action: Border, and Color: Blue.
-
Click +Drag To Position or drag the button onto your image.
-
Click and hold the left tab to move the clickable area around the image. Adjust the clickable area size by clicking and dragging the bottom right corner square.
-
Repeat steps 7 and 8 for each clickable area.
-
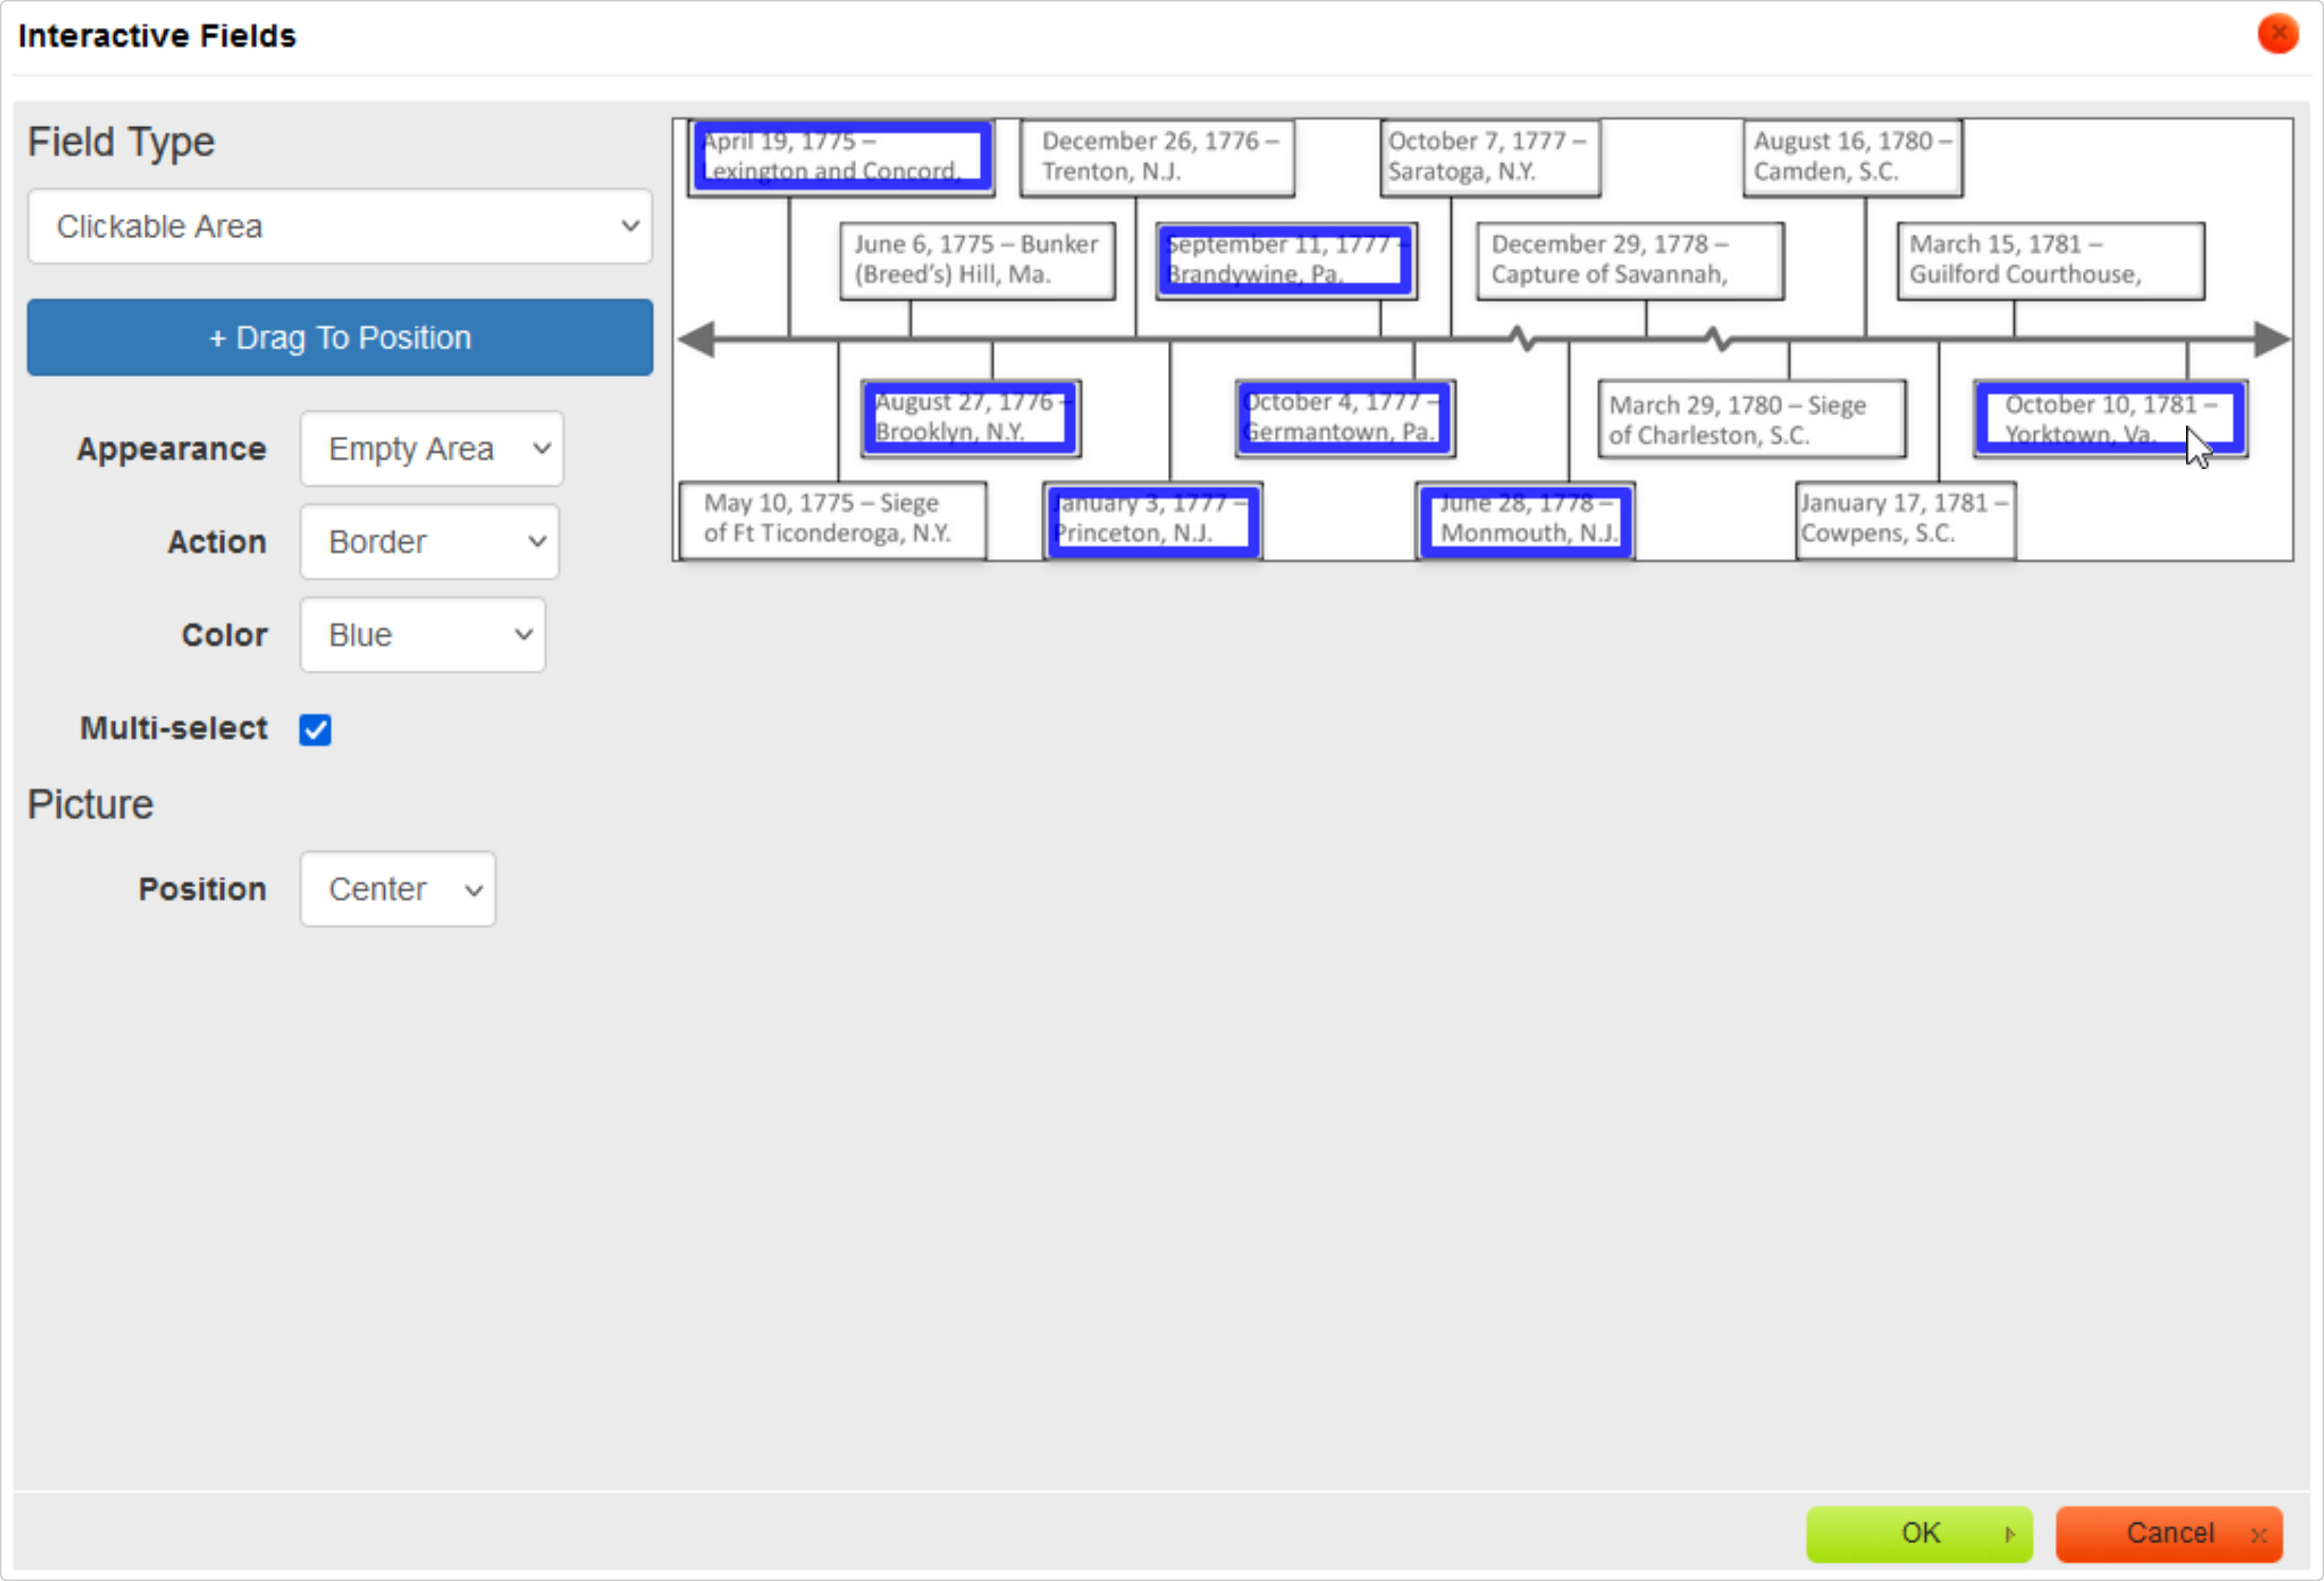
To mark an answer, click on a clickable area. A blue border will appear.
-
Click OK at the bottom of the dialog box.
-
In the editor, click Online Test Preview to see how the clickable object question will look and behave in an online test. When you are done, close the Preview, then then click Save.