Clickable Array - Bar Graph
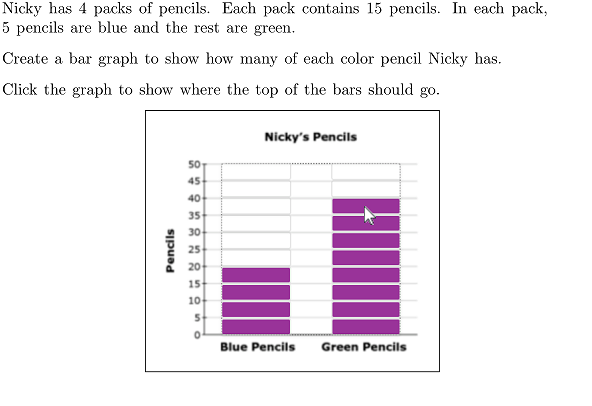
The example below is Problem 5 in “Clickable Arrays”.
Thumbnail Preview
Example Video
Step-by-step instructions
Follow the below steps to create the above question in Problem-Attic.
-
Go to the Arrange tab and click Write New Problem.
-
In the editor, write a question that allows the student to interact with an image, then press Enter.

-
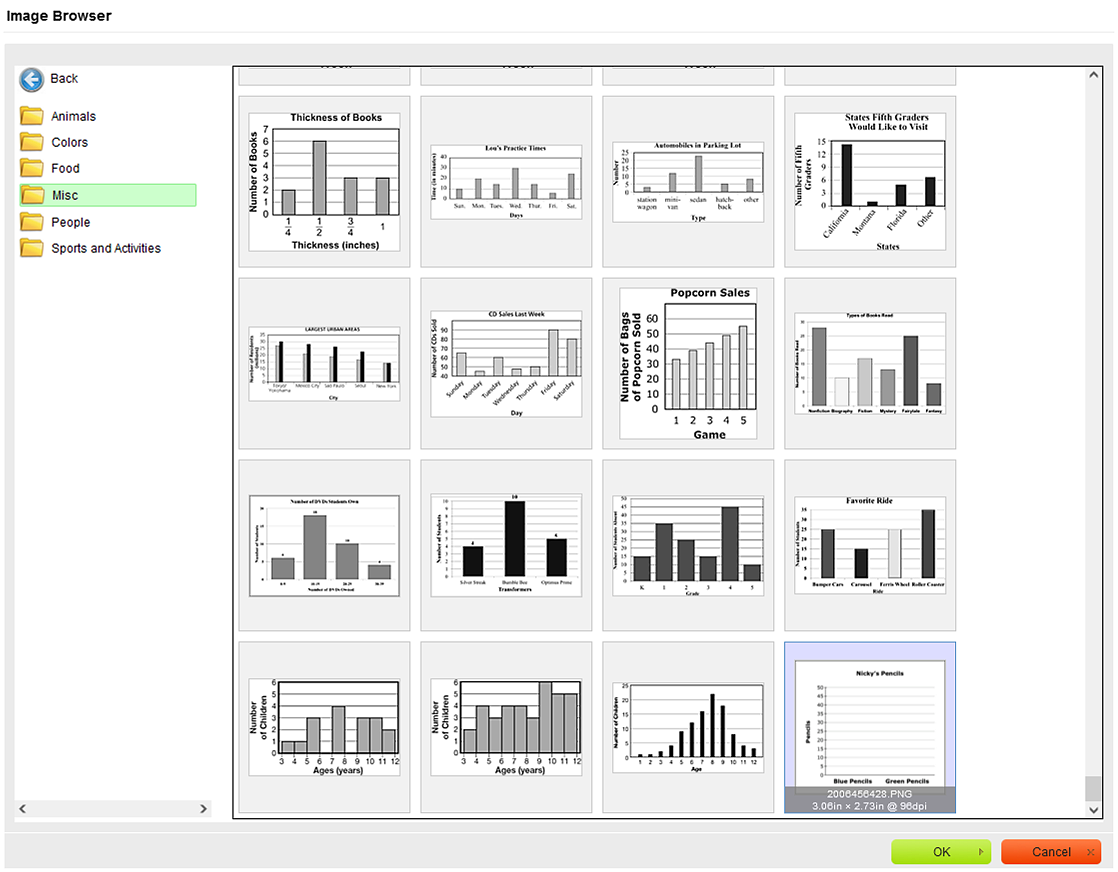
In the editor toolbar, click Image and upload an image or choose from Problem-Attic's library of stock images.
-
Click OK at the bottom of the dialog box.
-
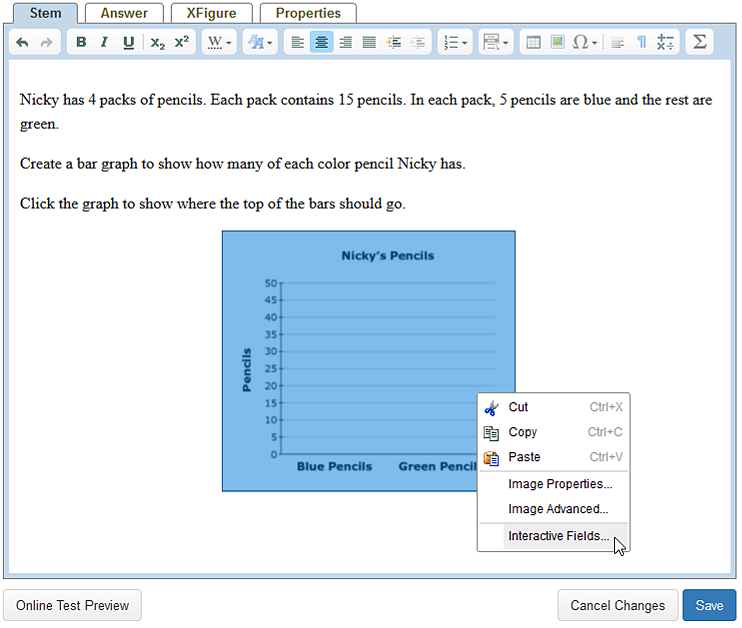
In the editor, right-click the image and select Interactive Fields.
-
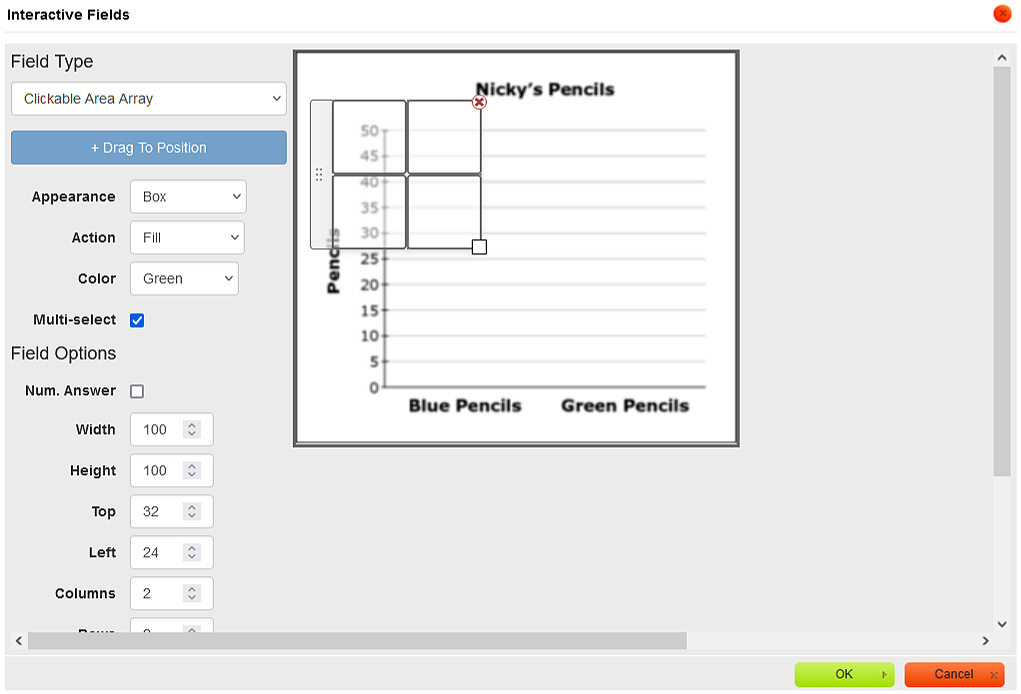
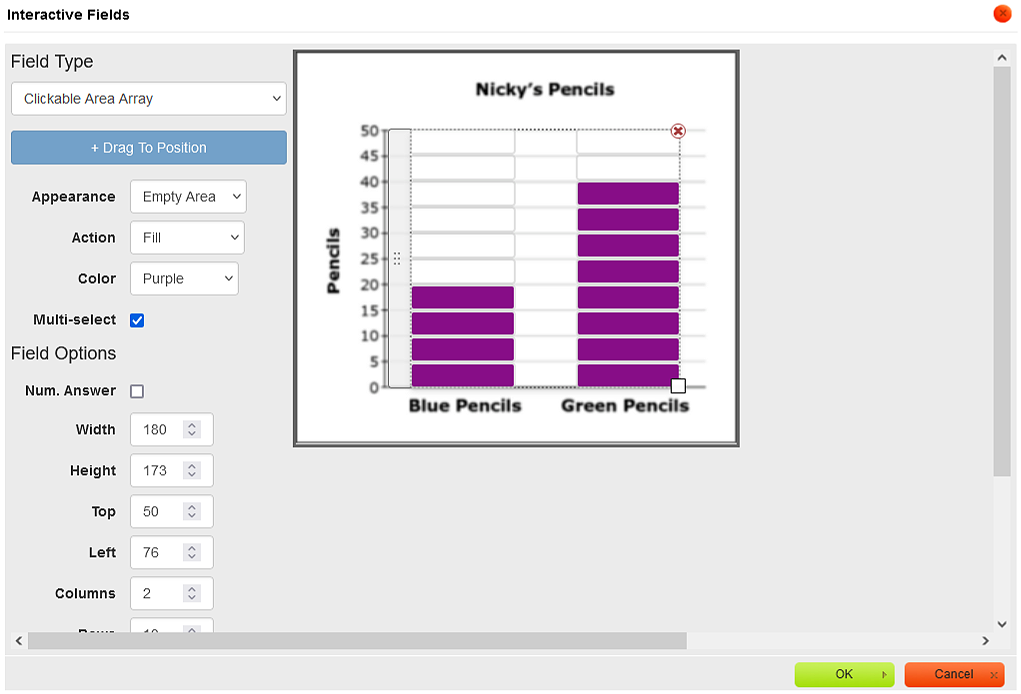
For Field Type, select Clickable Area Array. Click on +Drag To Position or drag the button onto your image to insert the array.
-
Move the array so that the top-left corner is properly positioned. Then click the bottom-right corner and move it so that the array is the right size.

-
For Array options, make the following changes:
-
Set Columns to 2
-
Set Rows to 10
-
Set Column Space to 40
-
-
Above the Array options, make the following changes:
-
Set Appearance to Empty Area
-
Set Action to Fill
-
Set Color to Purple
-
Check the Multi-select box
-
-
Set the answer by clicking on the correct clickable areas in the array.
-
Click OK at the bottom of the dialog box.
-
In the editor, click Online Test Preview to see how the question will look and behave in an online test. When you are done, close the Preview, then then click Save.