Document parts and passages
This page describes how reading passages are attached to questions and how they can be removed or “elevated” to a document part. There are various reasons for doing this.
-
Several passages may be attached to a question, and you don’t want all of them in your document.
-
You already assigned the reading material, and you want a document that has only follow-up questions.
-
You’re creating a document with “nested parts” and you want all passages to be at the top level with their own directions.
-
The sequencing of questions is causing Problem-Attic to reprint a passage unnecessarily.
For all of the above scenarios, the steps are similar. They’re given in the next section. After that, we’ll provide additional information about nested parts and directions. This is for reading teachers and anyone who works with passage-based questions (PBQs).
Notes:
-
When we use the word passage, we mean a reading selection, primary source document, reference chart or other stimulus that goes with a question but could also stand on its own—it could be printed/distributed separately.
-
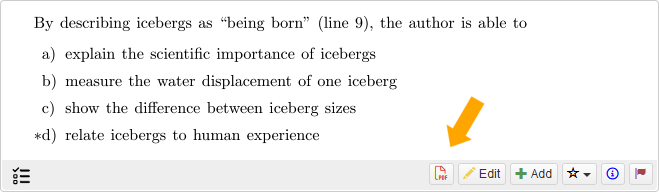
In Problem-Attic, if there's a passage attached to a question, then you’ll see a PDF icon on the thumbnail. You can click the icon to view the passage. And, if you select the question for your document, you automatically get the passage with it.
-
On this page, we mostly use the singular words passage and attachment. In fact, a PDF icon can represent several different passages joined together. In rare cases, depending on the source, they may be joined in a way that removing one will remove them all. But usually they can be split apart.
How to remove a passage
As noted above, a passage that’s attached to a question can be removed from it. That doesn’t necessarily mean it’s removed from your document. Technically, it’s detached from the question and moved up or elevated to a part. If you wish to remove it altogether, there’s just one additional step.
Assuming your document has questions with passages, follow these steps:
- Click the Arrange tab
- Click Details button
-
Click the Part icon in the document tree.
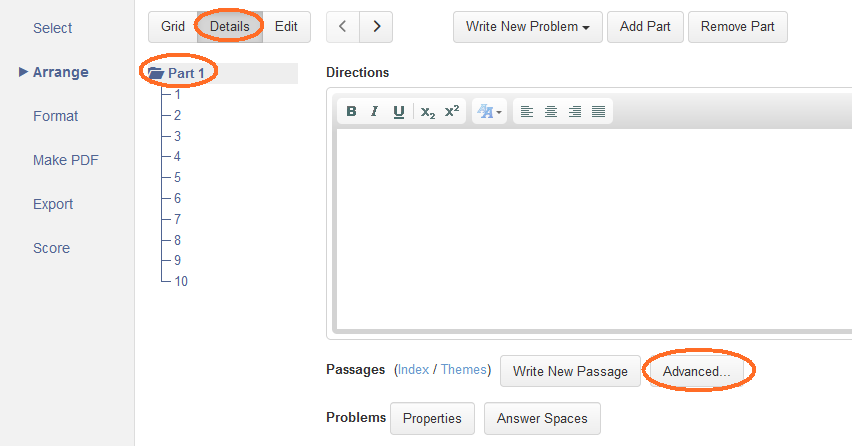
- Click the Advanced button.
- Click the Elevate Passages button.
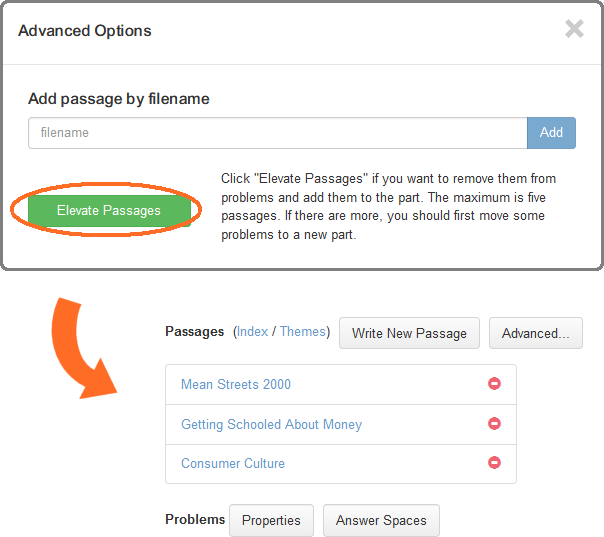
That’s it! All passages will now be at the part level and no longer attached to individual questions. If you want to remove one or more of the passages from your document, click the red delete button.
Notes:
-
By default, a Problem-Attic document has one part. When you use the Elevate option, passages from all questions get moved up until you reach a limit of five per part. If there are more than five passages, and you don’t want any of them, you can delete what’s been moved up and use the Elevate option again.
-
If you would like to remove passages from some questions but not all, an easy workaround is to create a new document part and move certain questions into it. The Select Options button can be used for that purpose. It is described here.
Nested parts and directions
This section focuses on a test layout that is common for English Language Arts. The techniques may be relevant to other subjects which have passage-based questions or “clusters”, such as newer assessments for NGSS.
Consider this model of a reading test which has paired passages:
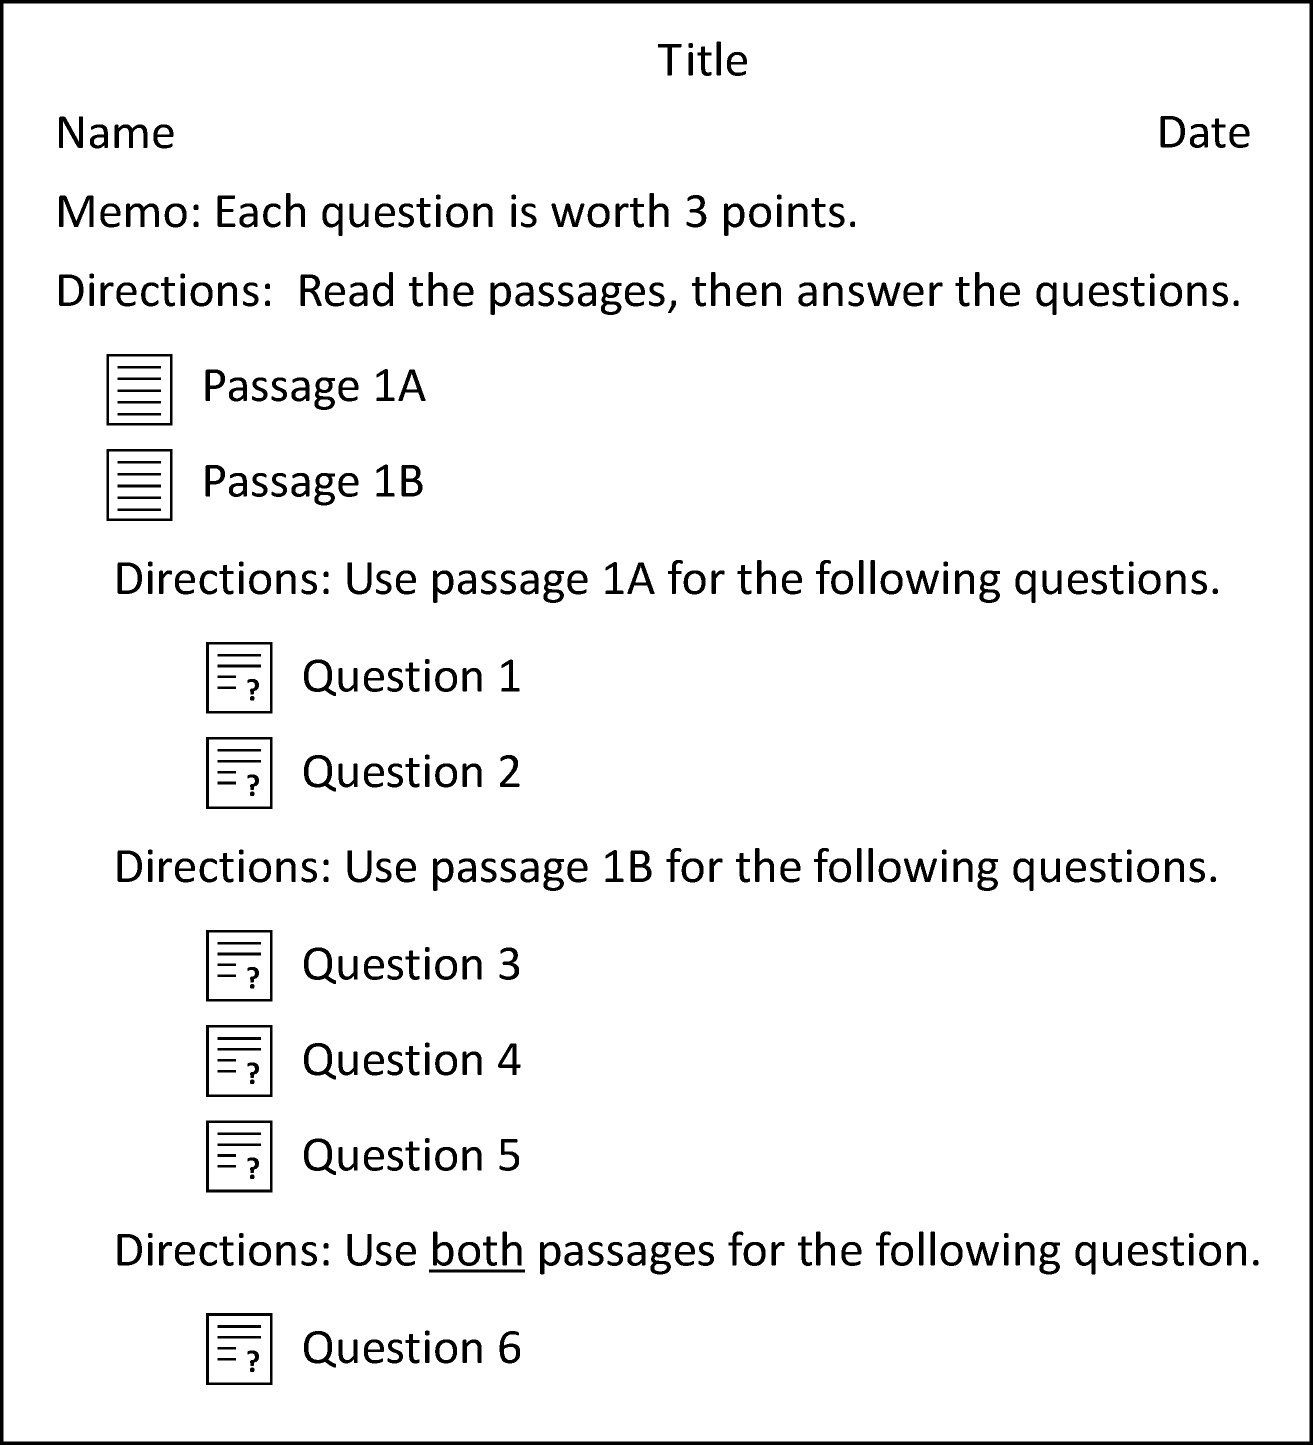
A Problem-Attic document can be structured exactly like the model above. Assuming you’ve selected questions that go with two passages, do this:
- Click the Arrange tab.
- Go through the steps above to elevate the reading passages to the part level. (Do not delete the passages, just elevate them.)
- Click the Grid button to see all questions.
- Hold down the Crtl key (or Cmd key on a Macintosh) and click on the questions that go with the first passage. You’ll see a blue outline when they’re selected.
- Click the Select Options button and choose “Move selected...” in the drop-down menu.
- In the dialog box, choose “New part”, then click Move.
- Repeat steps 4 and 5 for questions that go with the second passage.
- Repeat steps 4 and 5 for the remaining questions, which we assume go with both passages. Part 1 of your document will now be empty.
- Using the document tree on the left, drag parts 2, 3 and 4 into part 1, preserving their order. Your document will now have nested parts.
- Click the Details button, then click each part icon in the tree and add the appropriate directions.
If you follow the above steps, directions for the top-level part will appear before the reading passages, and directions for the nested parts will appear before each set of questions.
Of course there are many other ways to structure a document, and the order you do things, creating parts and moving questions around, doesn’t have to follow exactly the steps above. The main rules:
- you can nest parts up to four levels deep in a Problem-Attic, and
- a single part can have either subparts or questions but not both.
You can create the structure you want by using the Add Part button and moving questions manually, or you can use the Select Options button, which helps automate the process. Details are here.
Please contact us if you need additional information. We’re happy to help.