New! Support for answer fields and pop-up keyboards
Problem-Attic supports many different types of interactive questions, or what are common referred to as Technology Enhanced Items (TEIs). We recently added a new type of interactivity called Answer Fields. You can think of them like “fill-in-the-blank”, except they're much more versatile when it comes to formatting, inputting of answers, scoring, and placement—they can be inserted almost anywhere in a question.
One of the best ways to learn about Answer Fields is to see them live. Here is an online test with 40 sample questions:
www.problem-attic.com/test/t6vzd627
If you open the test in your browser, you'll see how answer fields are embedded in questions and how students interact with them. For most of the math questions, you can click on an answer field and see a pop-up keyboard. This gives students an easy way to enter an answer which is numeric or which contains a fraction or other math symbol. We'll discuss keyboards in more detail below.
Besides opening the online test, you can also download a PDF version of it or open the actual source document in Problem-Attic. Here are links:
The PDF illustrates something important about Problem-Attic: it's designed to deliver questions in many different forms, not just on an online test. When a test is printed, it may be easier to see students' work, and the answer fields still serve a purpose in terms of grading. The downside, of course, is that grading will be manual.
Please note that online testing and editing of interactive questions requires a school subscription. If your school subscribes, then you can open the sample document in Problem-Attic, see how the questions are written, and make any changes you like. (Go to the Arrange tab and click Edit.) There are also many more questions with answer fields that you can select from the database.
If you don't have full subscriber access, you can still open the sample document in Problem-Attic, change the formatting, swap out questions, and make a PDF. Or you can go to the Play Area and try editing, online testing, and scoring options there.
Adding an answer field to a question
There are two different ways of adding an answer field to a question. It can be inserted anywhere in the question "Stem", including in a table, between paragraphs, or right in the middle of a sentence. We'll call this a regular answer field. Alternatively, you can put an it on top of a picture. We'll call that an overlay.
Regular Answer Field
This kind of answer field is the easiest and most basic to understand and implement. Here are the steps
-
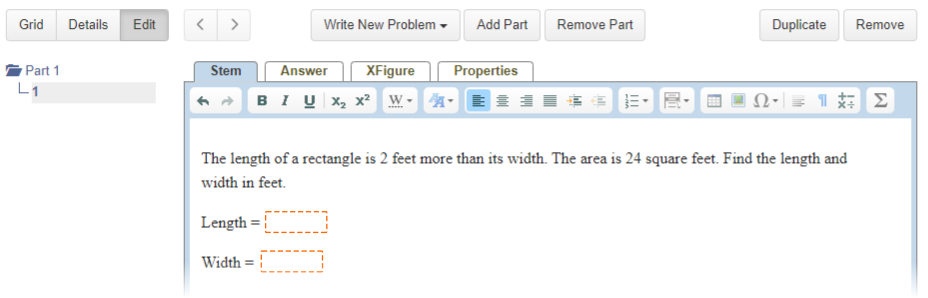
With a document already open, go to Arrange and click Write New Probem. Type the problem step normally. Take note of where you'd want answer field. In the example below, the orange dotted boxes where we'd like to put answer fields.
-
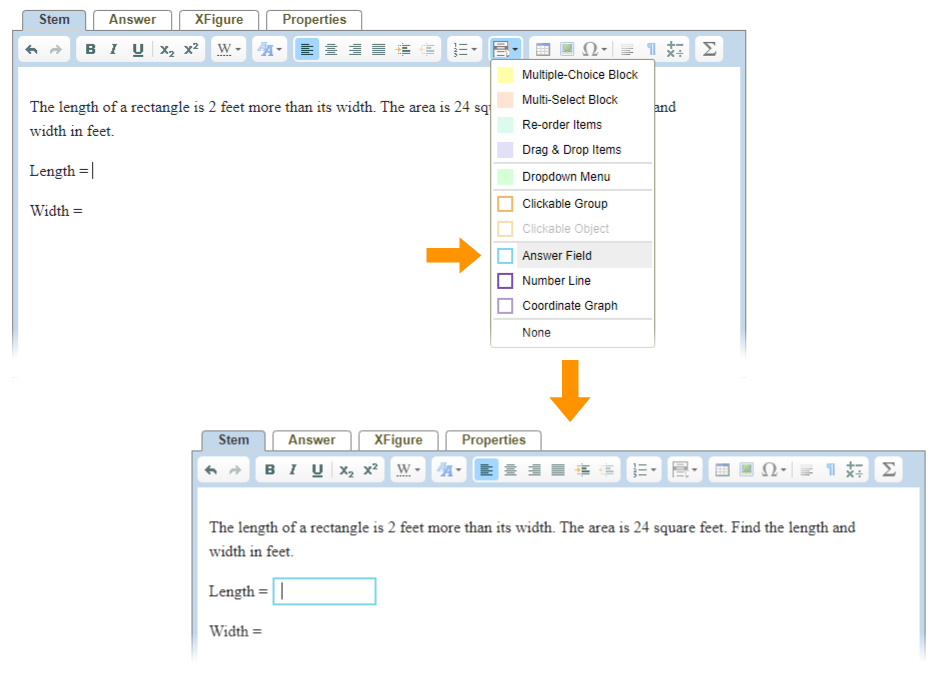
Place your cursor where you'd like an answer field to go, and then click on the Interactive menu.

-
Choose answer field. An empty answer field will appear at the cursor's position.
-
Type the answer in the field. The same steps were repeated for the second answer field.

-
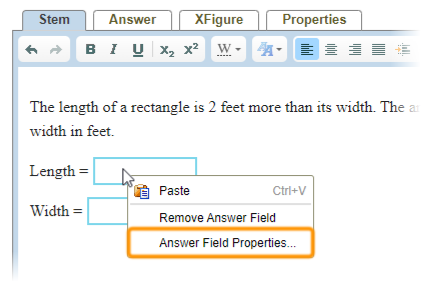
As another option you can right-click the answer field and choose properties from the dropdown menu. The Answer Field Properties dialog has a field to add or edit the answer. (The other properties are in the dialog are discussed further down)

-
As a third option, and just like the rest of the answer types in Problem-Attic, you can type your answer first, highlight it, and then choose Answer Field from the Interactive menu as well.
Picture Overlay
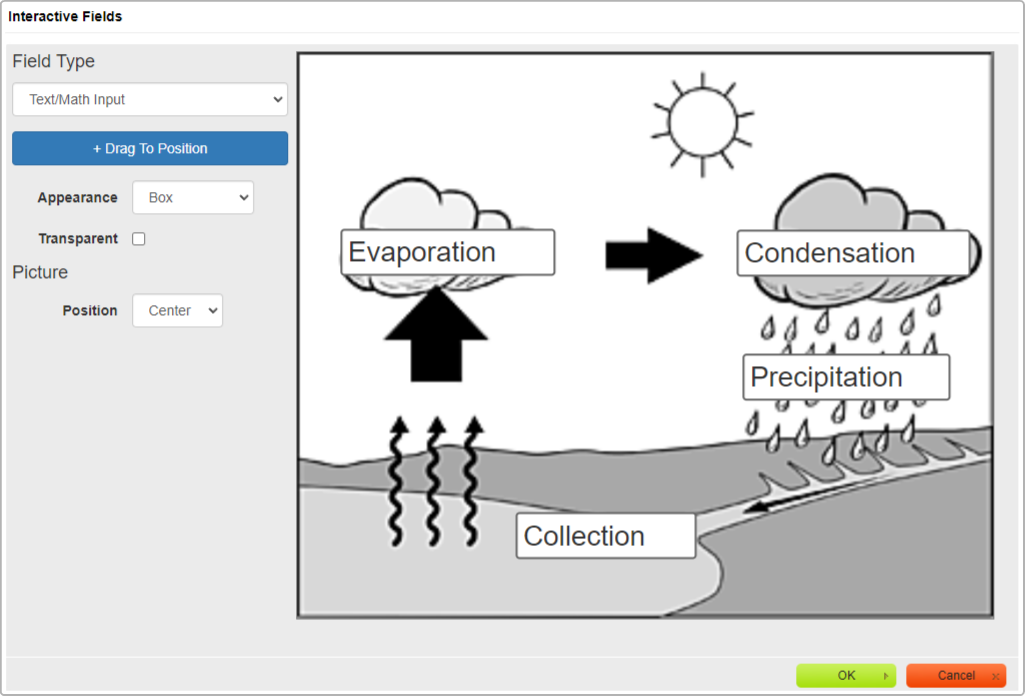
The Picture overlays feature allows you to place answer fields, directly on any given picture. For this example, we're going to use an image of the Earth's water cycle and place answer fields over the important stages for the student to fill in.
-
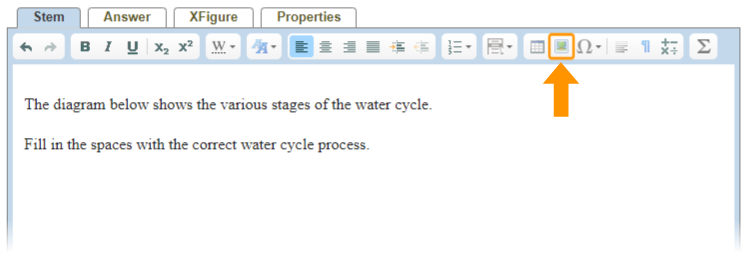
With a document already open, go to Arrange and click Write New Problem. Type out the problem as usual.
-
Click on the Image button on the toolbar to bring up the Image Browser
-
Within the Image Browser, click on Upload New and drag your desired image into the box. In our case this will be our water cycle image.
-
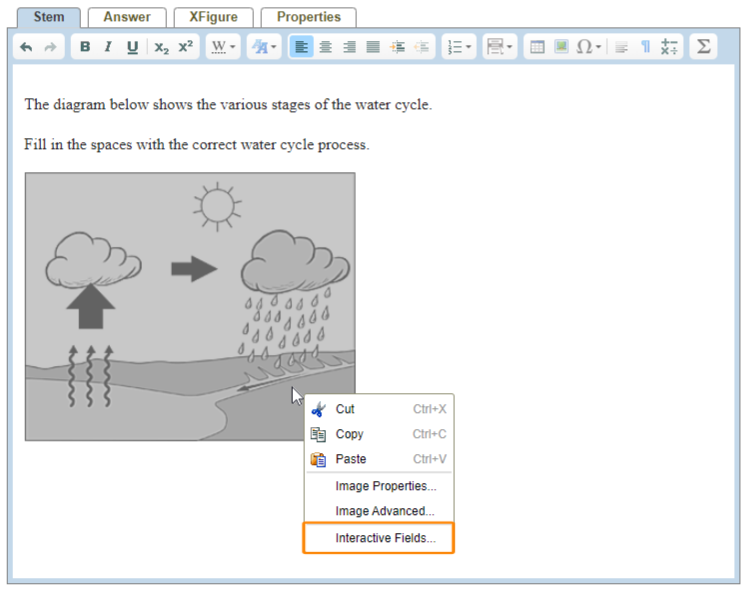
Right-click the image and click on Interactive fields in the context menu.
-
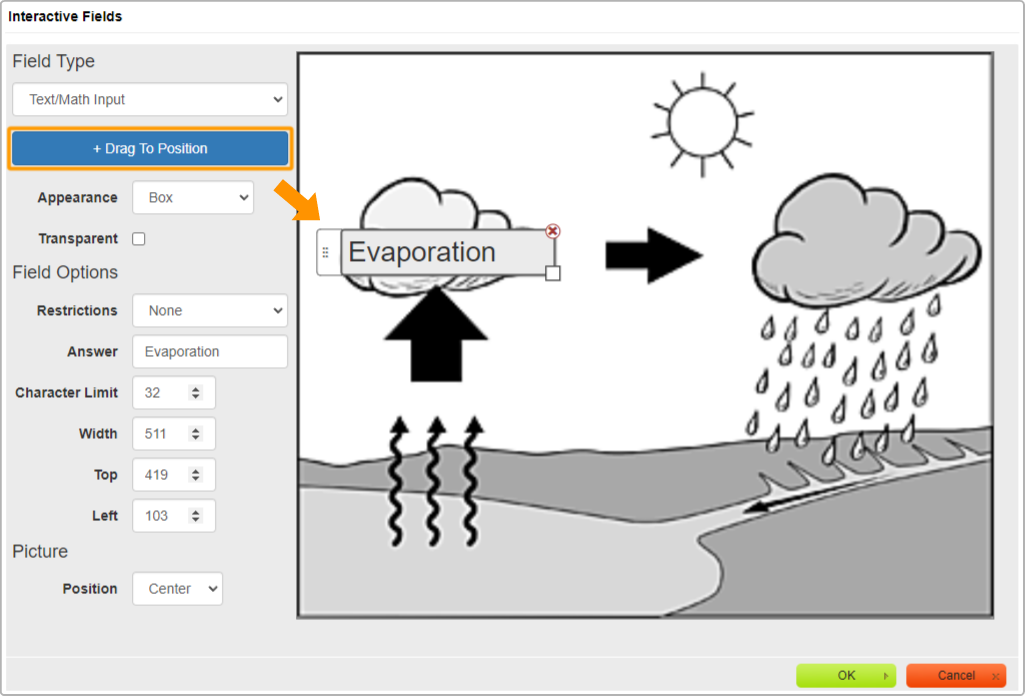
In the Interactive Fields dialogue for the Field Type dropdown, select Text/Math Input
-
Click on the “+ Drag to Position” button, and drag an answer field to your desired location on the image.
-
Adjust the size, appearance and transparency options of the answer field as you see fit.
-
Type in the correct answer in the newly placed answer field. This will be the correct answer that the student's answer will be graded against.
-
Repeat the above steps for additional answer fields.
Answer Field Properties
While answer fields can work like “fill in the blank”, there are many properties that you can control, from appearance, to text input, to keyboards for numerical answers and math formulas.
Properties are set by right-clicking an existing answer field, and clicking on Answer field properties in the dropdown menu.
The resulting dialog will look like the following...
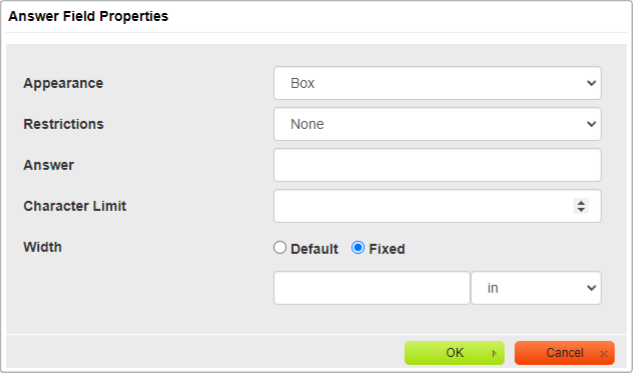
and it will have the following options: (Brief descriptinos of the sub options are also given.)
-
Appearance: How the answer field will appear on on online test. The Answer field can either appear as a:
- Box (default),
- Blank Line, or
- Empty Area
-
Restrictions: Any restrictions you'd like to put on the kind of characters that can be input into the answer field. This can greatly help with scoring as well as preventing unwanted answers. The available restrictions are:
- None (default): No restriction. Any characters can be input in the field.
- Simple Text: Only alphanumeric character, no symbols, are allowed.
- Numeric: Only numbers and basic mathematical symbols are allowed.
- Character: Only alphabetical characters are allowed.
- Single Digit: Only a single numeric digit is allowed.
- Uppercase Letter: Only a single uppercase letter is allowed.
- Math Formula: Alphanumeric characters, symbols and complex characters are allowed.
-
Answer: The correct answer for the answer field. (This was mentioned above.)
-
Character Limit: The limit of the number of characters that can be input into the answer field.
-
Width: How wide the answer field will appear on an online test.
- Default: The width of the answer field will adjust (up to a point) based on the length of the answer.
- Fixed: The width of the answer field will be a fixed length. Available units are inches, centimeters, points, em-spaces, and ex-spaces.
Math Keyboards
Problem-Attic now supports pop-up keyboards for answer fields on online tests. The supported pop-up keyboard types correspond to the type of restriction set on the answer field, which are the following:
-
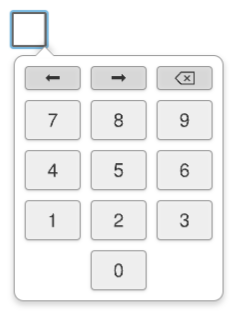
Single Digit:
-
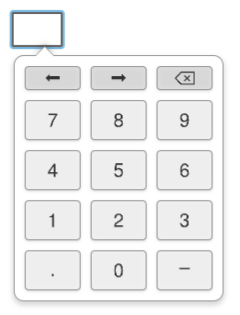
Integer and Numeric:
-
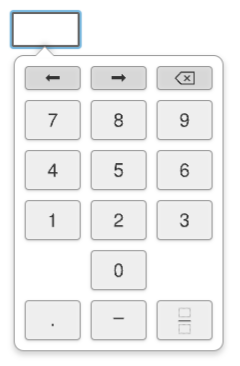
Numeric with Fraction Key*:
-
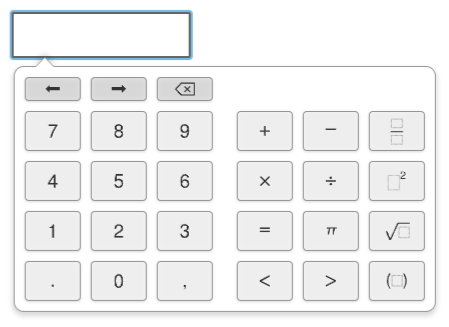
Math Formula:
*Note: To get Numeric with fraction key pop-up keyboard, the answer field restriction must be set to Numeric and in the Online Test Settings on the Export page, “Include fraction key for numeric” must be checked.
Additional settings for Pop-up Keyboards
On the Export page, in the Online Test Settings under Other Options, there are a few options that pertain to pop-up keyboards.
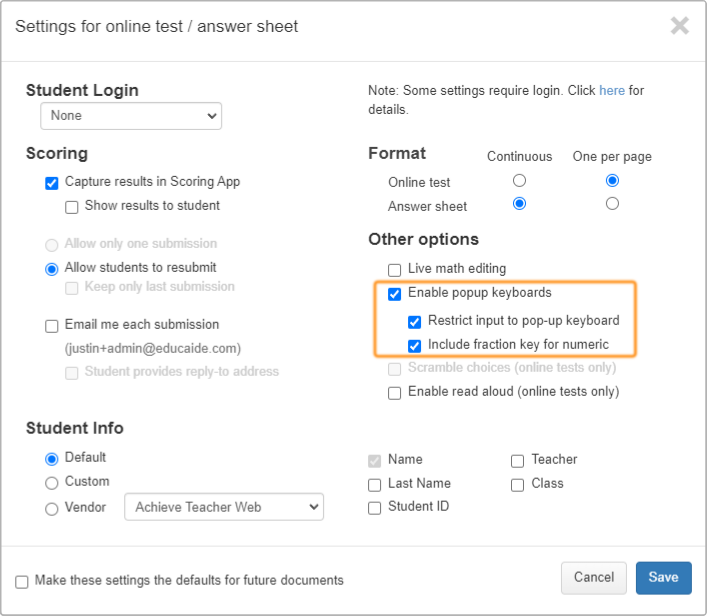
-
Enable pop-up keyboards: Enables pop-up keyboards to be used for answer fields that have the corresponding restriction.
-
Restrict input to pop-up keyboard: When checked, this option only allows input from the pop-up keyboard: any input from “hardware” keyboard will not be allowed.
-
Include fraction key for numeric: As mentioned above, when checked, answer fields with a numeric keyboard restriction will show the pop-up keyboard that includes the fraction key.